The first thing you're going to need to do is have the company open an AWS account (Account2), if it doesn't already have one, and give you privileges to create instances under that account.
Next, you have a couple of choices. You can (a) try to recreate your app in a new instance under the company account, or (b) you can copy your existing instance to the company account. If you're here, it's because you want to do (b), particularly if you're working on Windows, with all the security settings you've set and forgotten to get your app running in the first place.
Copying the instance is done in three steps: first create an image of your running instance in Account1. Then, give permissions to that image to Account2. Last, launch an instance from that image in Account2. Here it is in detail:
1. In Account1, create an AMI of the running instance. (To be extra careful, you can stop your instance before creating the image and then restart it if you need to, later).
The AWS instructions to create an AMI are here. In brief, from the "Instances" page, choose your instance. Go to the Actions menu and select "Create Image". Include any EBS volume(s) associated with your EC2 instance.
2. Share the AMI with the account ID of Account2. This is a 12 digit number that can be found by poking around Account2. I actually found this as part of an error message when I tried to do something that I didn't have permissions for (e.g. open the billing console).
To share the AMI (from Account1) go to the left side menu within the EC2 Service: Images -> AMIs. Select the AMI you want to share (which you created in step 1 above) and go to Actions -> Modify Image Permissions. There, edit permissions to allow access from Account2. The official instructions for sharing Windows AMIs are here.
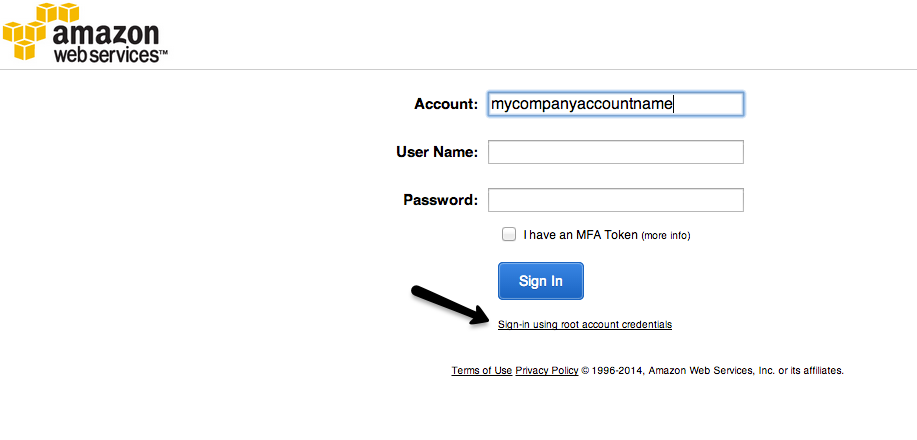
3. Log into Account2
Note: To log back in to your personal account, you may have to click the link at the bottom of the login-- "Sign-in using root account credentials":
4. Within Account2 go to EC2 services, menu item Images->AMIs.
Change the filter to "Private AMIs" (the other options are "Public" and "AMIs owed by me").
5. Select action "Launch". It will prompt you to use or create a new private key. Do this and save it somewhere safe that you remember.
Set the security settings as desired. You may want to look up the settings from your current instance in Account1.
6. Create an Elastic IP address (optional but recommended)
7. Associate the Elastic IP address with the newly launched instance it is running.
Note, if you are using Windows Remote Desktop Connection (RDC) that the new instance has the same login as the old instance so that you can still log in using RDC, just by putting in the new IP address.
8. Wait a few minutes for the IP address to propagate and check out your app on the new Elastic IP address. If it works, do the happy dance.